“We don’t call it stealing. We call it gaining inspiration”
There is no copyright on a landscape. If you spot the garden setting you’ve been aching to create but didn’t know how, Landscape Architectural Technology instructor Jennifer Jones (class of ’05) has a completely legitimate way to achieve it.
“We don’t call it stealing. We call it ‘gaining inspiration,’” she says.
But, basically, you copy it. Or, at least, that’s how you get started.
We asked Jones to share an easy, stripped-down approach to turning barren landscapes into the lush, colourful oases of our dreams – as seen in that yard down the block. All it takes is a camera, a marker and a willingness to roll up your sleeves and get your hands dirty.
Step 1. Take photos
 Get a shot of the landscape to be copied and one of the location that you plan to transform. Try frame the shot so that the scale is roughly the same in both.
Step 2. Draw all over the photos

Print the photos and get sketching. Don’t worry about your artistic skills. In fact, the less you have, the better, because simplifying the plants you see is the key. “It doesn’t matter what the picture is,” says Jones. “We just reduce everything into shapes.”
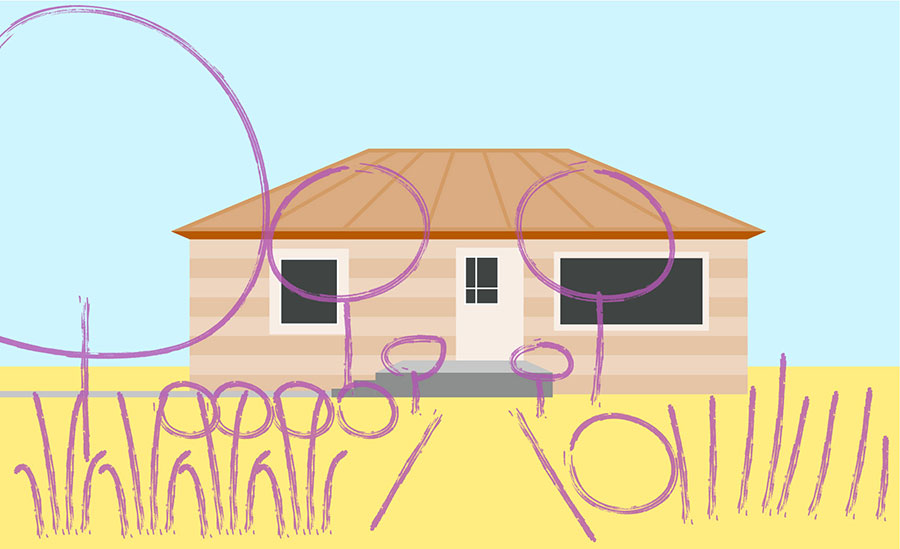
Start by tracing the most basic outlines of the plants in the inspiring garden: globes, cones, fountains, spiky things, mats. Then, transfer that group of shapes to the space getting the facelift.
That’s it. There’s your very rudimentary but foundational plan.
Step 3. Check your yard conditions
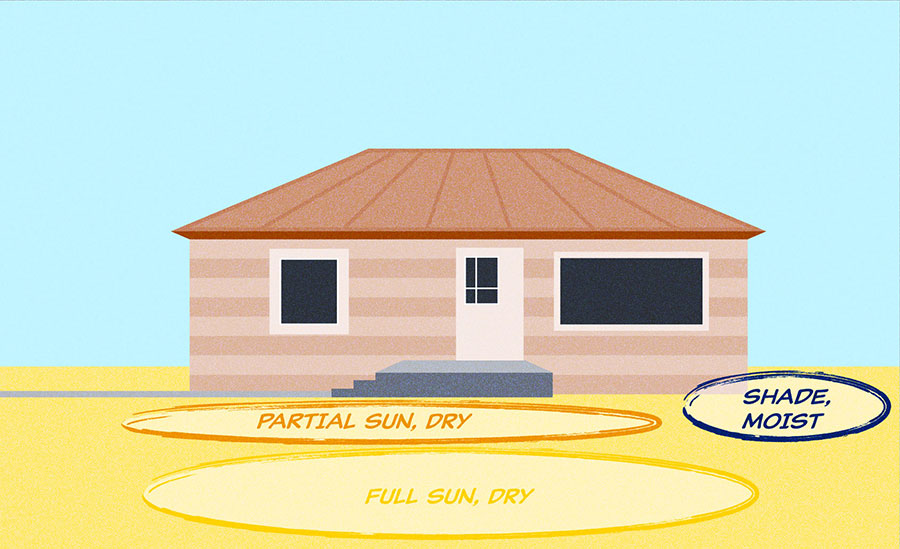
Site requirements, says Jones, will include soil conditions and sunlight. Watch your yard over the course of a day to see what areas get sun all day, part of the day or are shaded; note if the soil is generally dry or moist. Apply that information to your plan to help you choose plants that will thrive.
Step 4. Start selecting based on size, shape and site conditions
One of Jones’ favourite resources for choosing plants is the reference guide from Classic Landscapes, based in Edmonton. “All the things that they sell will grow here.” Other guides will do, she says, but make sure that the plants are rated for your hardiness zone (Edmonton is 3b or lower).
Flip through your guide and make a list of plants that match each shape in your plan (check the sidebar below for examples), starting with trees and shrubs.
“Choose your biggest, most expensive plants first because they’re the most visually impactful,” says Jones. They’re also the ones you’ll want to baby the most after planting. They form a “skeleton” for your yard, helping the landscape hold its shape throughout the seasons.
Fill out the rest of your plan, modifying it according to what space is left after you’ve plotted the big plants. Once you have a long-list chosen for shape, cut those that won’t tolerate your site conditions.
Step 5. Add colour
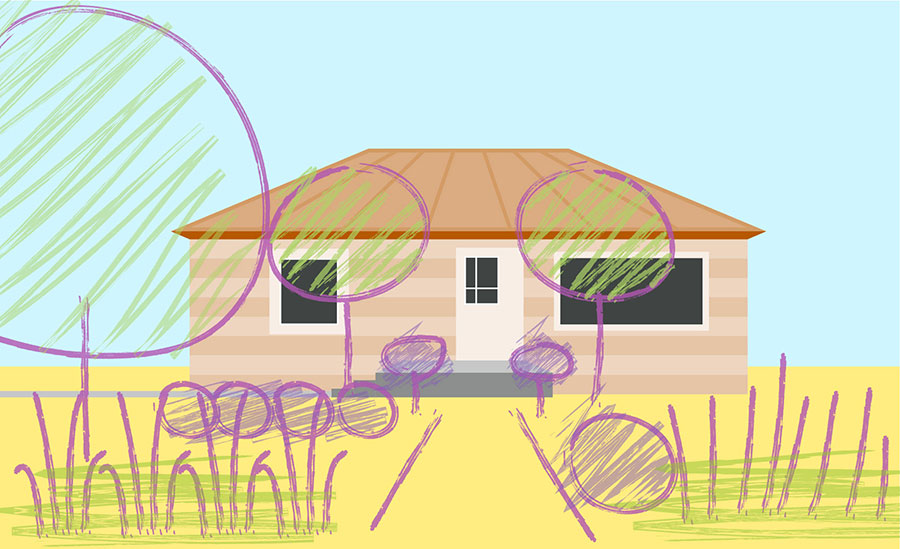
Continue narrowing your choices by choosing colours. Mark them on your plan and try to “sprinkle repetitive colours throughout the landscape,” says Jones. Lean on foliage and even bark colour to create patterns and balance all season long. “Don’t forget about [using] evergreens,” she adds.
Step 6. Add texture
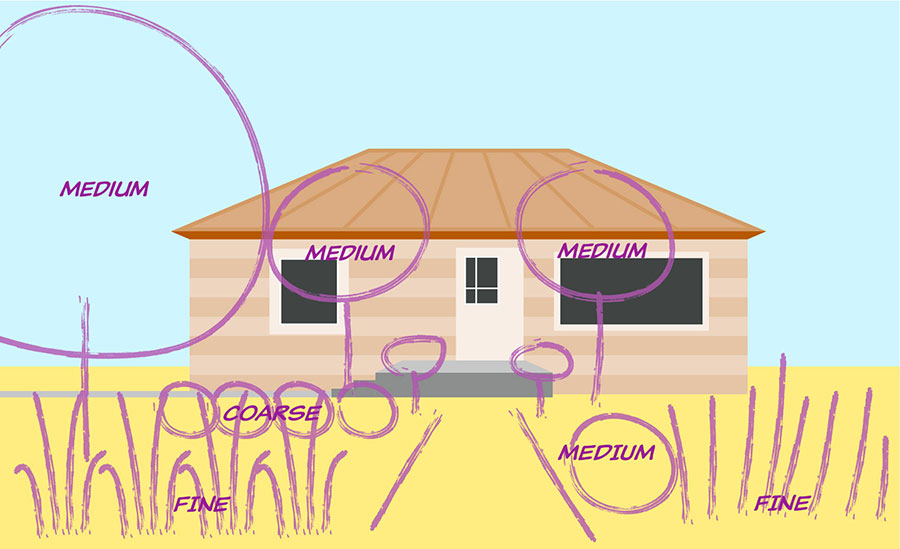
Increase the beauty of your landscape with a variety of leaf sizes and shapes, or texture. This ranges from coarse, such as a broad-leafed hosta, to fine, like the needles of a pine tree. Arrange plants so that coarse foliage provides a backdrop fine, rather than hides it.
Step 7. Dig it
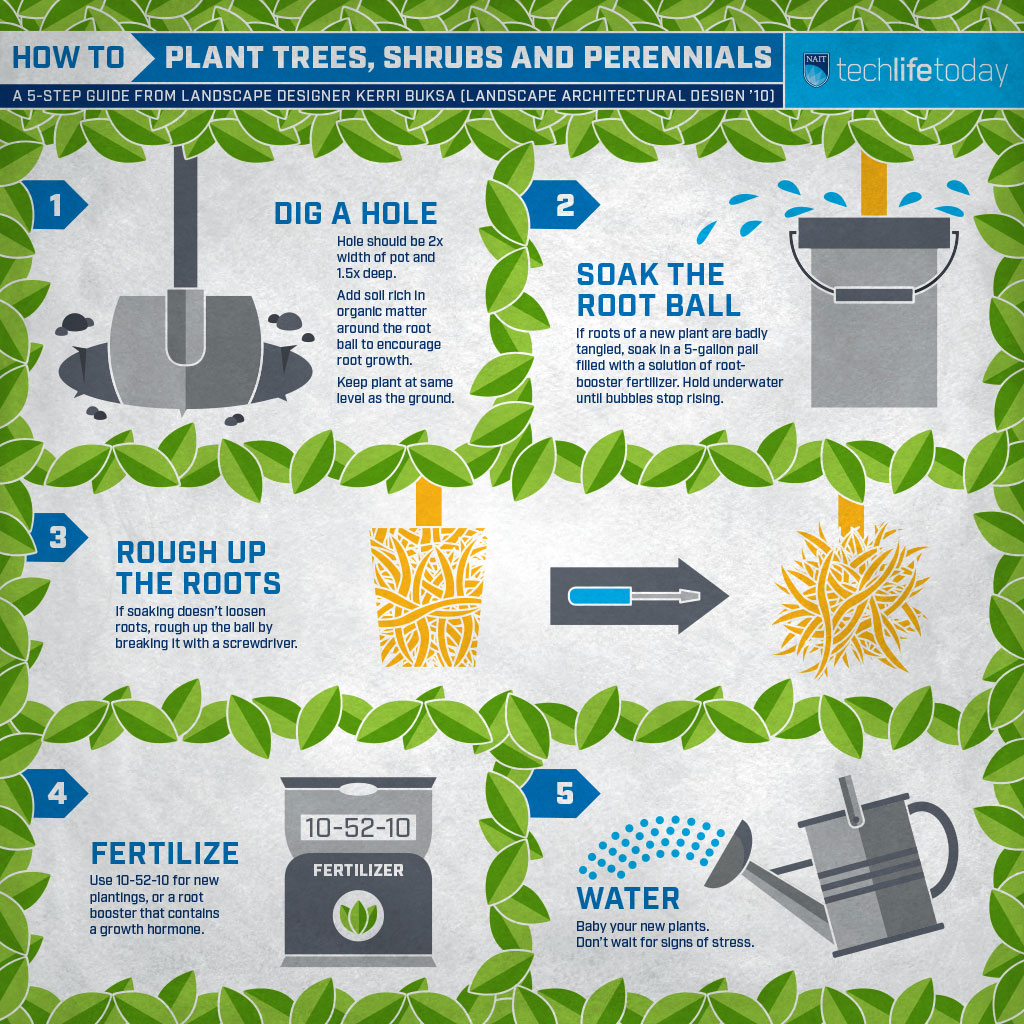
Jones is right about the stealing. Once you’ve gone through this process, you’ll have done nothing of the sort, and instead created something you can truly call your own. And after you’ve planted it, you’ll have the not just the drawings to prove it, but the callouses, too.
